How To Install ADA-Compliant Bathroom Fixtures?
Installing ADA-compliant bathroom fixtures ensures accessibility for everyone, including those with disabilities, while enhancing safety and usability in any home or commercial space. The Americans with Disabilities Act (ADA) sets specific standards for fixture height, clearance, and operation to promote independence. This guide walks you through the entire process, from planning to final checks, emphasizing precision and compliance. Whether you're renovating a residential bathroom or updating a public facility, following these steps minimizes errors and maximizes functionality.
Understanding ADA Compliance Standards
ADA guidelines focus on making bathrooms navigable and user-friendly, particularly for wheelchair users and individuals with limited mobility. Key requirements include grab bars positioned between 33 and 36 inches above the finished floor, toilets with seat heights of 17 to 19 inches, and lavatories with knee clearance at least 29 inches high and 30 inches wide. Sinks must have insulated pipes to prevent burns, and faucets should operate without tight grasping or twisting—think lever handles or touchless sensors.
Beyond dimensions, the standards address reach limits, ensuring controls like flush valves are within 44 inches from the floor for forward reach or 48 inches for side reach. Mirrors should extend to the sink rim, and doorways need at least 32 inches of clear width. Compliance isn't just about measurements; it's about creating an intuitive space. For instance, contrasting colors between fixtures and walls aid visibility for those with low vision. Always consult the latest ADA Standards for Accessible Design, available from the U.S. Access Board, and check local building codes, as they may impose additional rules. Planning with these in mind prevents costly rework.
Essential Tools and Materials Needed
Gathering the right tools and materials upfront streamlines the installation and ensures everything meets ADA specs. Start with basics like adjustable wrenches, pipe cutters, and a torque wrench for secure fittings. A level is crucial for verifying heights and alignments, while a stud finder helps locate secure mounting points for grab bars. Don't forget plumbing essentials such as PEX tubing, PVC fittings, and thread seal tape to prevent leaks.
For ADA-specific items, stock up on compliant toilets like elongated bowl models with comfort-height seats, wall-mounted lavatories with apron fronts for knee space, and reinforced grab bars rated for at least 250 pounds of dynamic load. Faucets should feature automatic or single-lever designs, and shower valves need anti-scald features set to a maximum of 120 degrees Fahrenheit. Expansion tanks are vital here too—they install on the hot water line to absorb pressure fluctuations from thermal expansion, protecting pipes and fixtures during temperature changes. Quality materials from reputable suppliers ensure longevity; opt for corrosion-resistant finishes like brushed nickel or stainless steel to withstand heavy use.
Preparing Your Bathroom Space
Preparation sets the foundation for a smooth installation, transforming a standard bathroom into an accessible haven. Begin by shutting off the main water supply and draining all lines to avoid surprises. Remove old fixtures carefully—cap pipes to prevent debris entry and protect floors with drop cloths. Inspect the subfloor and walls for levelness; uneven surfaces can compromise ADA heights, so use self-leveling compound if needed.
Measure the space meticulously: mark toilet centerlines 12 to 18 inches from side walls, ensuring 56 to 60 inches of front clearance for wheelchair maneuvers. For lavatories, confirm 30 by 48 inches of floor space in front. All City Plumbers recommend reinforcing walls behind grab bar locations with plywood blocking during this phase, as it provides rock-solid anchorage without visible alterations. Electrical outlets should sit 15 inches above the floor and 48 inches apart to avoid interference. Ventilation is key—upgrade to a quiet, ADA-compliant exhaust fan rated at 50 CFM minimum to control humidity and odors. This thorough prep phase, though time-intensive, averts plumbing mishaps and ensures every fixture aligns perfectly.
Step-by-Step Installation of the Toilet
Installing an ADA-compliant toilet demands precision to achieve the exact seat height and stability. Position the wax ring and closet flange squarely on the drainpipe, then lower the toilet base while straddling the bowl for control. Secure it with closet bolts torqued to manufacturer specs—typically 60 inch-pounds—to prevent rocking, a common accessibility hazard.
Connect the water supply using a flexible braided hose, but first flush out the line to remove sediment. Adjust the fill valve for a water level half an inch below the overflow tube, and set the flush valve for efficient operation without excessive force. Test multiple flushes to confirm quiet, reliable performance. For added accessibility, pair it with a floor-mounted grab bar set at 33-36 inches high, anchored into studs. This setup not only meets ADA forward-reach limits but also supports safe transfers.
Installing the Lavatory and Faucet
The lavatory installation prioritizes knee clearance and burn prevention. Mount the sink at 34 inches maximum rim height, using a wall-hung model with a 27-inch apron for unobstructed legroom. Secure the basin to reinforced wall studs with lag screws, then attach the trap and tailpiece assembly, ensuring all joints are solvent-welded or compression-fitted tightly.
Faucet selection shines here—install a touchless or lever model centered over the basin, with the spout projecting at least 4 inches for easy reach. Insulate supply lines with foam sleeves to meet scald-protection rules. Run water tests at varying temperatures, aiming for a consistent 110-degree mix. This configuration allows comfortable use from a seated position, embodying ADA's user-centered ethos.
Adding Grab Bars and Accessories
Grab bars provide critical support, so install them horizontally at 33-36 inches, spaced 12-18 inches apart for optimal grip during transfers. Drill pilot holes into pre-installed blocking, apply silicone sealant, and torque bars to 250-pound load specs. Vertical bars beside toilets aid standing, while L-shaped units in showers combine horizontal and vertical grips.
Accessories like fold-down benches in showers (19-25 inches high) and handheld showerheads on slide bars enhance versatility. Mount soap dispensers and towel bars within 40-inch reach limits. These elements, when seamlessly integrated, elevate the bathroom's safety profile.
Shower and Tub Modifications for Accessibility
For showers, create a curbless entry with a 60-inch turning radius inside, sloping the floor 1/4 inch per foot toward the drain. Install fold-up seats, adjustable showerheads, and lever diverters. Tubs benefit from transfer benches and low-entry designs, with grab bars encircling the rim.
Thermostatic mixing valves maintain steady temperatures, preventing shocks. Waterproof membranes under tile ensure durability in wet zones.
Routine Maintenance and Long-Term Tips
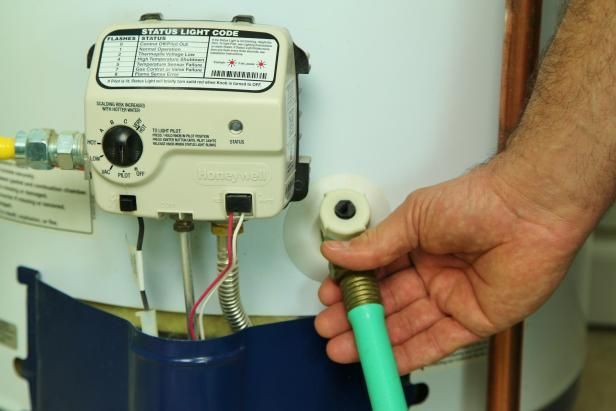
ADA fixtures demand upkeep to sustain compliance. Clean with non-abrasive products, inspect seals quarterly, and lubricate moving parts annually. And remember to prepare your plumbing before vacations by shutting off the main valve, draining lines, and installing tankless heaters if prone to freezing—simple habits that prevent burst pipes upon return.
Schedule professional inspections every few years, especially in high-traffic areas.
Conclusion
Mastering the installation of ADA-compliant bathroom fixtures transforms spaces into inclusive environments that prioritize dignity and ease. By adhering to precise standards, using quality materials, and following methodical steps, you achieve not just compliance but enduring functionality. Homeowners and builders alike benefit from safer, more versatile bathrooms that stand the test of time.