How To Properly Install And Maintain A Dishwasher?
Installing and maintaining a dishwasher requires careful planning and attention to detail to ensure the appliance functions optimally and lasts for many years. A well-executed installation prevents leaks, electrical issues, and drainage problems, while ongoing maintenance protects your investment and keeps your kitchen running smoothly. This article elaborates on the steps involved in properly installing a dishwasher, necessary tools, and maintenance practices, highlighting essential considerations and professional tips.
Preparing for Dishwasher Installation
Before beginning the dishwasher installation, precise measurements of the designated cabinet space are critical to guarantee a proper fit. The width, depth, and height of the opening should slightly exceed the dimensions of the dishwasher unit to allow maneuverability. Removing any existing dishwasher or cabinet panels carefully is necessary to avoid damage.
Make sure all necessary tools are on hand, including a cordless drill, adjustable wrench, pliers, level, and measuring tape. Also, assemble supplies such as the water line installation kit and dishwasher power cord. Electrical safety is paramount—disconnect power from the circuit breaker before commencing any work.
Step-by-Step Dishwasher Installation
Start by connecting the water supply to the dishwasher. Secure the 90-degree elbow fitting and attach the fill hose to the valve situated at the dishwasher’s base. Hand tighten first and then use pliers to secure the connection with an additional quarter to half turn. It is important not to use thread sealant or tape on water valve threads, and always ensure the rubber washer is present inside the hose fitting to prevent leaks.
Next, adjust the dishwasher’s leveling legs to match the height of your cabinet opening. A level dishwasher ensures proper water drainage and prevents standing water inside the unit. Use a carpenter’s level to confirm the dishwasher is even from front to back and side to side.
With assistance, slide the dishwasher into the cabinet opening, guiding the power cord, water supply line, and drain hose through the cutout in the cabinet wall or floor. Maintain about six inches of clearance from the back wall to avoid crimping hoses.
Anchor the dishwasher securely to your countertop or surrounding cabinetry using the mounting brackets provided with your appliance. Fasten these firmly but carefully, verifying that the dishwasher door aligns flush with adjacent cabinet doors. Once mounted, reconnect the water supply shut-off valve and power source.
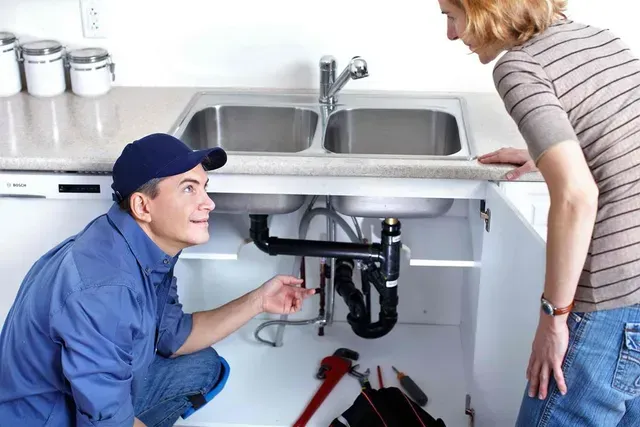
A test cycle should follow installation to check for leaks, electrical issues, or abnormal noises. Follow your dishwasher’s user manual for detailed instructions on this step. If any issue arises, consider reaching out to professional services. Companies like All City Plumbers provide expert installation and repair assistance, including emergency services should urgent problems occur.
Tools and Techniques in Installation
During installation or repairs, understanding when to use a pipe cutter versus a hacksaw is essential for efficiency and safety. A pipe cutter offers a precise and clean cut on copper or plastic pipes with minimal burr formation, ideal for water supply line adjustments. In contrast, a hacksaw is preferred for cutting metal pipes when a pipe cutter cannot fit or where greater force is necessary. Using the right tool protects your pipes from damage and ensures a clean fit for connections.
Dishwasher Maintenance Best Practices
Routine maintenance extends the life of your dishwasher and keeps it performing at peak efficiency. Regularly clean the filter and drain to prevent food buildup, which can cause clogging and unpleasant odors. Drain clearing is crucial to avoid water pooling inside and ensure thorough wash cycles.
Inspect water supply hoses and connections periodically for signs of wear, cracks, or leaks. Replace damaged hoses promptly to prevent water damage. Additionally, descaling the dishwasher to remove mineral deposits will keep heating elements and sprays functioning effectively.
Running an empty cycle with a dishwasher cleaner monthly can remove grease and limescale, preserving the mechanical components. Maintaining the door gasket with periodic cleaning prevents leaks around the door seal.
When to Engage Professional Help
While many installation steps and routine maintenance tasks can be undertaken by knowledgeable homeowners, some situations require professional expertise. If you detect water leaks, electrical faults, or drainage problems that you cannot diagnose or resolve, contact licensed plumbers immediately. Fast action can prevent extensive damage and costly repairs.
Emergency services from trusted providers like All City Plumbers ensure prompt response to critical plumbing failures, minimizing disruption. For complex installations or repairs involving cutting and fitting water lines, enlist professionals to guarantee compliance with local codes and manufacturer specifications.
Conclusion
Proper installation and conscientious maintenance safeguard your dishwasher’s performance and longevity, saving you time, money, and inconvenience. Familiarity with installation steps, the appropriate tools such as pipe cutters and hacksaws, and regular upkeep routines are fundamental. When in doubt or facing urgent problems, turn to reputable professionals for support. This measured approach preserves your kitchen’s efficiency and avoids costly emergencies in the future.