Fixing a Jammed Garbage Disposal
In any bustling kitchen, a functional garbage disposal is indispensable, efficiently grinding up food waste to keep sinks clear and kitchens clean. However, encountering a jammed garbage disposal can disrupt daily routines and create unwelcome backups. Knowing how to troubleshoot and resolve these issues promptly can save time and frustration. This guide offers five practical tips to help you safely and effectively address common garbage disposal jams at home, ensuring your kitchen remains a hub of convenience and cleanliness.
Reach out to All City Plumbers for plumbing services!
Power Off and Inspect:
When faced with a jammed garbage disposal, the first crucial step is ensuring safety by powering off the unit and inspecting it thoroughly. Always prioritize safety when dealing with kitchen appliances, especially those involving electrical components. By turning off the disposal at the main circuit breaker or by unplugging it, you eliminate the risk of accidental activation during maintenance. Once safely powered down, carefully inspect the disposal unit both visually and manually. Look for any visible obstructions or foreign objects that may be causing the jam. This initial inspection sets the stage for further troubleshooting and ensures a safer environment for subsequent repair steps.
Use the Reset Button
After safely powering off the garbage disposal and inspecting it for any visible obstructions, the next step in resolving a jam is to locate and utilize the reset button. This button is typically found at the bottom or side of the disposal unit. Pressing the reset button helps to reset the motor and may clear minor jams caused by overload or temporary obstruction. It's important to press the reset button only once to avoid damaging the motor. If the disposal does not reset or the jam persists, proceed to the next troubleshooting steps for a thorough resolution.
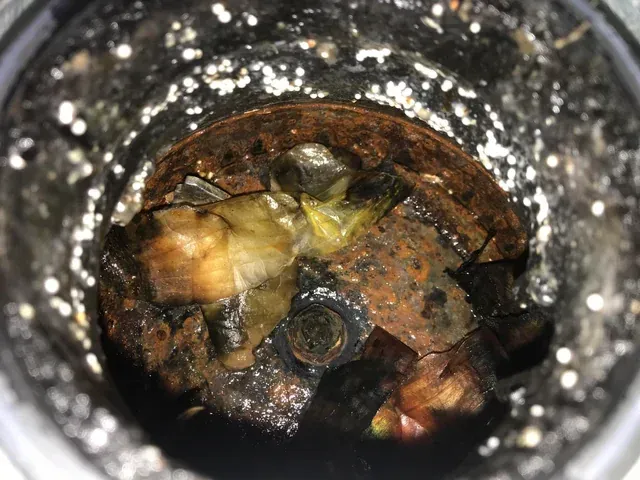
Allen Wrench Method
Turn Off Power: Ensure the garbage disposal is completely powered off. This involves switching off the disposal unit from the circuit breaker to prevent any accidental activation.
Locate the Hex Hole: Underneath the garbage disposal unit, near the center, you’ll find a hexagonal hole. This is where the Allen wrench (also known as a hex key) will be inserted.
Insert the Allen Wrench: Take the appropriately sized Allen wrench and insert it into the hex hole. The size typically ranges from 1/4 inch to 1/2 inch, depending on the model of your garbage disposal.
Rotate Clockwise and Counterclockwise: Once inserted, move the wrench back and forth in both clockwise and counterclockwise directions. This action helps to dislodge any debris or object causing the jam.
Remove the Obstruction: As you move the wrench, you may feel resistance or hear a grinding noise, which indicates the obstruction is being cleared. Be patient and continue until the wrench moves freely in the hex hole.
Power On and Test: After clearing the jam with the Allen wrench, restore power to the garbage disposal unit from the circuit breaker. Test the disposal by running cold water and turning it on briefly to ensure it operates smoothly without any unusual noises or vibrations.
Read more about how to repair a broken garbage disposal!
Jam Buster/Wrench
The Jam Buster, also known as the Jam Wrench, is a specialized tool designed to help you quickly and safely resolve jams in your garbage disposal unit.
- Turn off the power to the garbage disposal unit.
- Locate the hexagonal hole under the disposal unit.
- Insert the Jam Buster/Wrench into the hex hole firmly.
- Rotate the Jam Buster/Wrench back and forth.
- Feel for resistance or obstructions as you rotate.
- Continue rotating until the wrench moves freely.
- Turn the power back on and test the garbage disposal.
Plunge or Use Pliers
To dislodge a jammed garbage disposal, you have a couple of effective options beyond the standard methods. Using a plunger can help create pressure to push through minor clogs, while pliers can be used to manually rotate the impellers inside the disposal to free up stuck objects. Each method requires caution and a careful approach to avoid damaging the disposal unit or injuring yourself. Understanding these techniques ensures you can safely and effectively resolve common disposal issues without professional assistance.
Conclusion:
In conclusion, troubleshooting and fixing a jammed garbage disposal can often be managed effectively at home with basic tools and techniques. By following these steps—whether it's resetting the unit, using an Allen wrench, or employing a jam buster—you can usually restore your disposal's functionality without needing to call a plumber. However, if these methods don't work or if you encounter more serious issues like motor failure or leaks, it's advisable to seek professional assistance to prevent further damage and ensure your disposal operates smoothly for the long term. Taking proactive steps to maintain your disposal can also minimize the likelihood of future jams, keeping your kitchen running smoothly.