How To Properly Replace A Faulty Toilet Handle?
A faulty toilet handle can be a persistent source of frustration in any household. Whether the handle is loose, sticks, or refuses to flush the toilet altogether, addressing the issue swiftly is vital to maintaining a functional and hygienic bathroom. As with all plumbing tasks—from trying to fix a leaky dishwasher connection to tackling drain clearing—a methodical approach ensures both long-term results and peace of mind. In this article, we provide a comprehensive, step-by-step guide on how to properly replace a faulty toilet handle with the care and professionalism that experts, such as All City Plumbers, would demonstrate.
Understanding the Role of Your Toilet Handle
The toilet handle is a simple yet essential part of the flushing mechanism. Typically made of metal or plastic, it is connected via a lift arm to a chain or wire that raises the flapper or flush valve, allowing water to flow from the tank into the bowl. Over time, regular use can lead to wear or loosening of the handle assembly. Beneath the surface, mineral deposits or corrosion can further compromise performance, leading to partial flushes or stuck handles. Like with any vital household fixture or appliance, such as when you need to fix a leaky dishwasher connection, timely intervention preserves water efficiency and prevents further plumbing issues.
Common Signs and Causes of a Faulty Toilet Handle
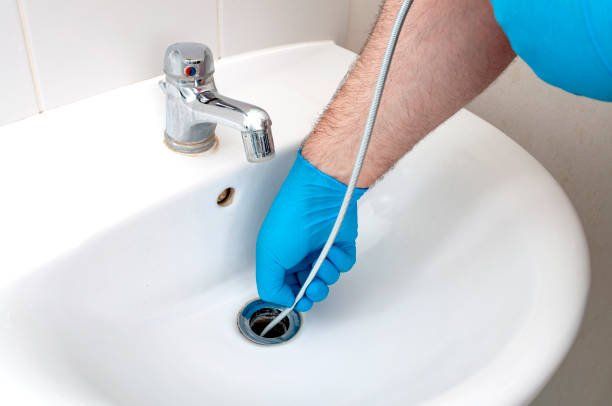
It is important to recognize the first signs of trouble, which most often include a handle that's hard to press, one that remains in the down position after use, or a flush that no longer initiates a full cycle. Usual causes can include stripped or rusted mounting hardware, mineral build-up, or a broken lift arm. Occasionally, improper installation or repeated rough use can also lead to failure. Just as neglecting drain clearing can lead to major backups, ignoring a faulty handle can escalate into a more complicated repair job.
Preparation and Precautionary Steps
Before starting, ensure you have the necessary replacement parts. Most toilet handles are universal, but it is wise to purchase a handle compatible with your toilet’s design and orientation. Basic tools required include an adjustable wrench, pliers, and occasionally a screwdriver. A towel for water drips and gloves for hygiene are also recommended.
Always begin by turning off the water supply to the toilet. This shutoff is typically located on the wall behind or beside the toilet. Flush the toilet to empty the tank; this reduces splashing and allows clear access to internal parts. Place the tank lid in a safe place to avoid accidental damage.
Step-By-Step Guide: Replacing a Faulty Toilet Handle
1. Remove the Old Handle
Inside the tank, locate the nut securing the handle to the tank wall. This nut is usually positioned directly opposite the external handle. It is important to note that this nut is almost always reverse-threaded—meaning it should be turned clockwise to loosen (opposite of a standard threaded nut).
Carefully disconnect the lift chain or wire from the lever attached to the handle. This is usually done by unhooking the chain from the hole or slot in the lever. Using an adjustable wrench or pliers, loosen the securing nut and slide the old handle out from the outside of the tank.
2. Clean the Surface Area
Before installing the new handle, clean the hole in the tank wall to remove any mineral deposits, rust fragments, or old sealant. This simple step ensures a smooth fit for the new hardware and reduces the risk of leaks or future corrosion. Similar to principles applied in drain clearing or addressing a clog, thorough cleaning makes all the difference in system performance.
3. Install the New Handle
Insert the new handle assembly through the hole from the outside of the tank. Thread the supplied nut onto the lever shaft from inside the tank, again using reverse-threading (counterclockwise to tighten in most cases). Make sure the handle sits flush and feels secure but avoid over-tightening, which can crack porcelain or plastic components.
Once the handle is fixed, attach the lift chain or wire to the new lever arm. Ensure that the chain has a slight amount of slack; too tight and the flapper may not seal properly, too loose and the toilet won’t flush fully. Most handles and levers provide several holes or adjustment points for this purpose.
4. Final Adjustments and Testing
Before closing the tank, turn the water supply back on. Allow the tank to fill while observing the connection for leaks and ensuring the handle remains firmly in place. Once the tank is full, test the flush by pressing the new handle. The action should be smooth and the flush should occur without sticking or resistance. Adjust the chain connection on the lever if necessary for optimal performance.
Test the handle several times, making additional small adjustments as needed to achieve a perfect flush with every use. Replace the tank lid once you’re satisfied with the result.
Maintenance Tips and When to Call a Professional
Toilet handle assemblies are designed for durability, but periodic inspection will extend their service life. Wipe down external parts regularly and check for signs of corrosion or mineral buildup inside the tank, especially if you live in an area with hard water. Conduct occasional flush tests to ensure the chain or wire remains at the right tension.
If you encounter persistent problems—such as recurring leaks, broken flapper arms, or evidence of tank cracks—consulting a professional like All City Plumbers is recommended. Complex toilet repairs or subtle leaks may require specialized tools or parts, and an expert can diagnose and resolve issues quickly while ensuring code compliance.
As with all plumbing work, the same attention to detail that goes into more extensive jobs, such as drain clearing or attempting to fix a leaky dishwasher connection, should be applied here. Proper installation and regular care both safeguard your home and provide continued peace of mind.
Conclusion
Replacing a faulty toilet handle is a straightforward yet essential task that plays a vital role in maintaining your household’s comfort and efficiency. With the right tools, preparation, and methodical approach, you can ensure smooth, reliable operation of your toilet. Remember, regular inspection and prompt action on plumbing issues save you time and protect your home from bigger headaches. And when in doubt, turning to trusted professionals like All City Plumbers guarantees a thorough job, whether you are replacing a toilet handle, clearing a drain, or repairing a leaky dishwasher connection. By embracing these best practices, you’ll keep your bathroom and entire plumbing system in optimal condition for years to come.

